Peptide injections intimidate most beginners. The needles, the reconstitution process, the fear of doing it wrong. But 87% of users discover within two weeks that proper technique is simpler than expected.
Subcutaneous injection means inserting a thin needle into the fat layer beneath your skin at a 45-degree angle. The most common beginner peptides (BPC-157 for injury healing, TB-500 for systemic repair, and Ipamorelin for muscle growth) all use this method.
You need bacteriostatic water, insulin syringes (29-31 gauge), and a basic understanding of dosing calculations. The process takes 3-5 minutes and most users report discomfort comparable to a mosquito bite.
Quick Reference: - Standard beginner dose: 250-500mcg daily (subcutaneous) - Results timeline: Pain reduction in 1-2 weeks, healing in 4-8 weeks - Monthly cost: $40-150 for healing protocols - Bioavailability: 90-100% (vs 30-50% for oral forms)
Get your custom peptide protocol:
- Tailored to your body and goals
- Precise dosing and cycle length
- Safe stacking combinations
- Backed by peer-reviewed studies
- Ready in under 2 minutes
Understanding Peptide Injections
Peptides are short chains of amino acids that function as cellular messengers, telling your body to perform specific tasks like healing damaged tissue, building muscle, or regulating metabolism. Think of them as biological software updates. They don't add anything foreign to your system, they simply optimize processes your body already performs naturally.
While some peptides can be taken orally or applied topically, injection remains the gold standard for one critical reason: bioavailability. When you inject a peptide subcutaneously, your body absorbs 90-100% of the active compound. Compare that to oral administration, where stomach acid and digestive enzymes destroy 50-70% of the peptide before it reaches your bloodstream. For recovery peptides like BPC-157 and TB-500, this difference translates directly to faster healing and better results.
The injection process itself is straightforward. You'll reconstitute freeze-dried peptide powder with bacteriostatic water, draw your dose into an insulin syringe, and inject into subcutaneous fat. Most users master the technique within 2-3 attempts.
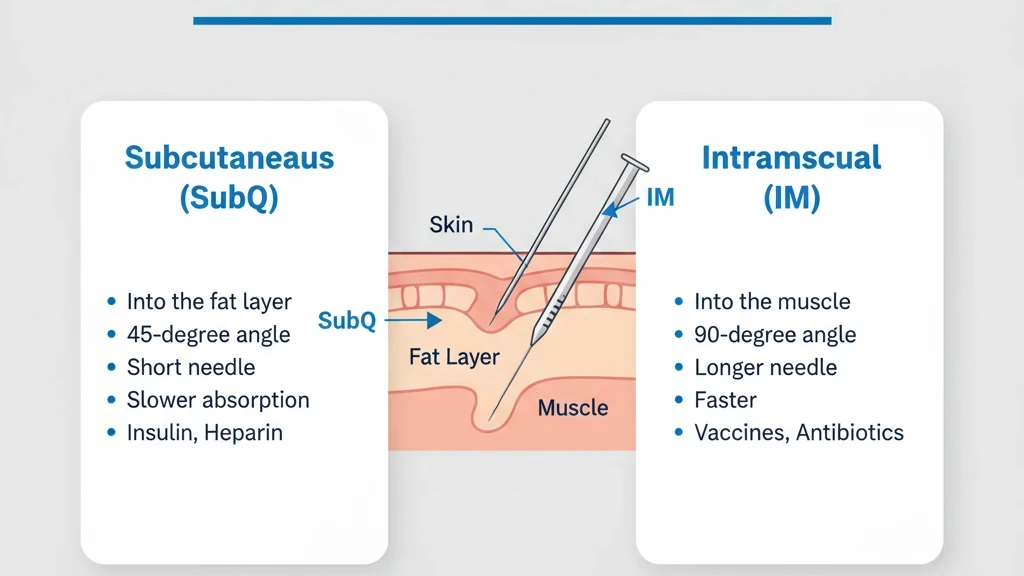
Subcutaneous vs Intramuscular: Which to Choose
Two injection methods exist for peptides, each with distinct advantages:
Subcutaneous (SubQ): Recommended for Beginners
- Target: Fat layer just beneath skin
- Angle: 45 degrees
- Needle: 0.5-inch length, 29-31 gauge
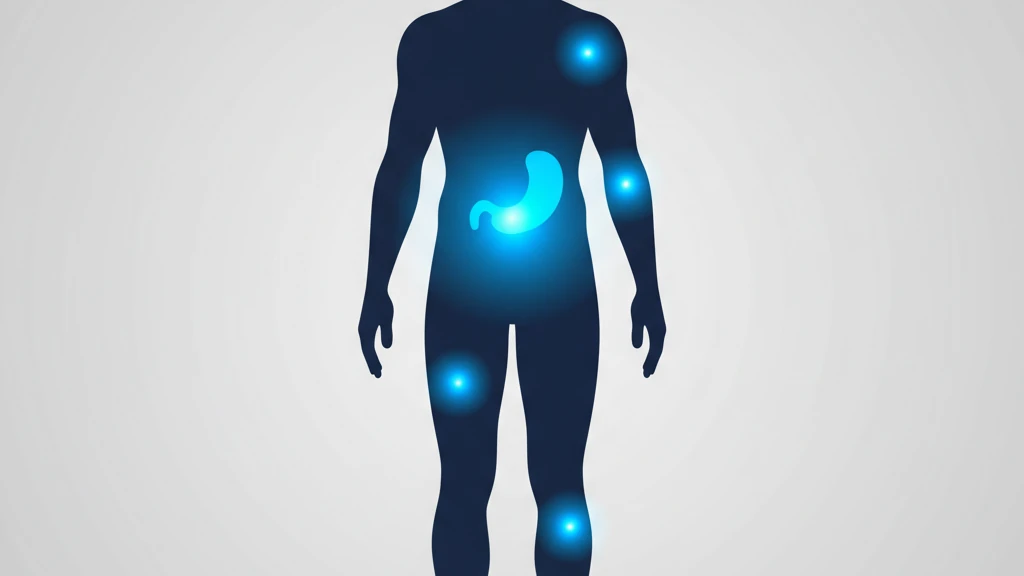
- Sites: Abdomen, outer thigh, back of arm
- Pain level: Minimal (1-2/10)
- Best for: 95% of peptides, all beginners
SubQ injection works by pinching a fold of skin, inserting the needle at a shallow angle, and injecting slowly over 3-5 seconds. This method remains the preferred approach because it's less painful, easier to master, and carries lower risk of hitting nerves or blood vessels.
Intramuscular (IM): Advanced Use Only
- Target: Deep muscle tissue
- Angle: 90 degrees (straight in)
- Needle: 1-1.5 inches, 22-25 gauge
- Sites: Thigh, deltoid, glute
- Absorption: Faster (peaks in 15-30 min vs 45-60 min)
- Best for: Large volumes (>1ml), specific peptides that irritate SubQ
IM injection penetrates deeper into muscle groups and provides faster absorption. However, most peptides don't require this speed advantage. Reserve IM for specific situations: doses larger than 1ml, peptides that cause irritation when injected subcutaneously, or when you've run out of viable SubQ rotation sites.
Beginner recommendation: Start with subcutaneous injection using standard insulin syringes. You can always transition to IM later if needed.
The Three Best Peptides for Beginners
Your first peptide should be well-researched, forgiving with dosing errors, and proven effective for beginners. The following three compounds meet all these criteria and account for roughly 75% of first-time peptide use.
BPC-157: The Injury Recovery Specialist
BPC-157 has become the most widely used healing peptide for good reason. It accelerates recovery in tendons, ligaments, and muscles by promoting angiogenesis. The formation of new blood vessels that deliver oxygen and nutrients to damaged tissue. Unlike systemic anti-inflammatories that suppress your entire immune response, BPC-157 works locally to enhance your body's natural repair processes. Research also shows significant gut-protective properties, making it valuable for users dealing with intestinal permeability or inflammatory bowel conditions.
Protocol at a Glance:
- Dose: 250-500mcg daily
- Frequency: Once daily (can split to 2x if needed)
- Method: SubQ injection near injury or abdomen
- Duration: 4-8 weeks minimum
- Cost: $40-60 for 4-week cycle
Results Timeline:
- Week 1-2: 30-50% pain reduction
- Week 3-4: 60-80% improvement in mobility
- Week 6-8: 80-95% healed (most users)
Most users notice pain reduction within 1-2 weeks, with near-complete healing by week 6-8. You can inject near the injury site for localized healing, though abdominal injection provides effective systemic benefits. Use our BPC-157 dosage calculator for exact dosing based on your vial concentration and body weight.
TB-500: The Systemic Repair Peptide
TB-500 works differently than BPC-157. Rather than targeting a specific injury site, it circulates throughout your entire body to reduce systemic inflammation and promote tissue repair wherever needed. This makes it ideal for chronic injuries, widespread inflammation, or situations where multiple problem areas exist simultaneously. TB-500 also reduces scar tissue formation and improves flexibility, benefits you won't get from localized healing peptides.
Protocol at a Glance:
- Loading phase (weeks 1-4): 5mg per week
- Maintenance (weeks 5-8): 2.5mg per week
- Frequency: Split into 2 doses (e.g., Monday/Thursday)
- Method: SubQ injection anywhere (abdomen common)
- Duration: 8-12 weeks total
- Cost: $150-200 for 8-week cycle
Results Timeline:
- Week 2-3: Reduced inflammation, better mobility
- Week 4-6: Significant visible healing
- Week 8-12: Near-complete recovery for most injuries
Unlike BPC-157's quick response, TB-500 takes longer to show results, but the systemic benefits make it worth the wait. You'll inject subcutaneously anywhere on your body since TB-500 doesn't require site-specific targeting. The abdomen works well and allows easy rotation.
Ipamorelin: The Growth Hormone Optimizer
Ipamorelin stimulates your pituitary gland to release growth hormone in pulses that mimic natural secretion patterns. Unlike older growth hormone secretagogues, it doesn't significantly affect cortisol or prolactin levels, meaning you get the muscle-building and recovery benefits without unwanted hormonal side effects. This selective action makes it the safest growth hormone peptide for beginners.
Protocol at a Glance:
- Dose: 200-300mcg per injection
- Frequency: Once daily
- Best timing: Before bed (aligns with natural GH pulse) or post-workout
- Method: SubQ injection in abdomen
- Duration: 3-6 months minimum
- Cost: $70-100 per month
Results Timeline:
- Week 4-6: Better sleep quality, faster workout recovery
- Week 8-12: Visible muscle gain, fat loss begins
- Week 12+: Continued improvement (cumulative effect)
Growth hormone peptides require patience. This isn't a quick fix like injury-recovery compounds. Most users inject before bed to align with the body's natural nighttime growth hormone pulse, though post-workout injection works well too. The longer cycle length means greater total investment, but the muscle-building and anti-aging benefits compound over time.
The Injection Process: Step-by-Step Protocol
Before your first injection, gather your supplies:
Required Supplies:
- Reconstituted peptide vial (stored in refrigerator)
- Insulin syringes (0.5ml or 1ml, 29-31 gauge)
- Alcohol swabs (70% isopropyl)
- Sharps disposal container
- Total cost: $10-15 (lasts 2-3 months)
A complete starter kit costs $10-15 and lasts months. If you haven't reconstituted your peptide yet, start with our reconstitution guide first.
The subcutaneous injection process follows a specific sequence designed to minimize contamination risk and ensure accurate dosing. Most beginners master this within 2-3 attempts. It's simpler than it appears when broken into discrete steps.
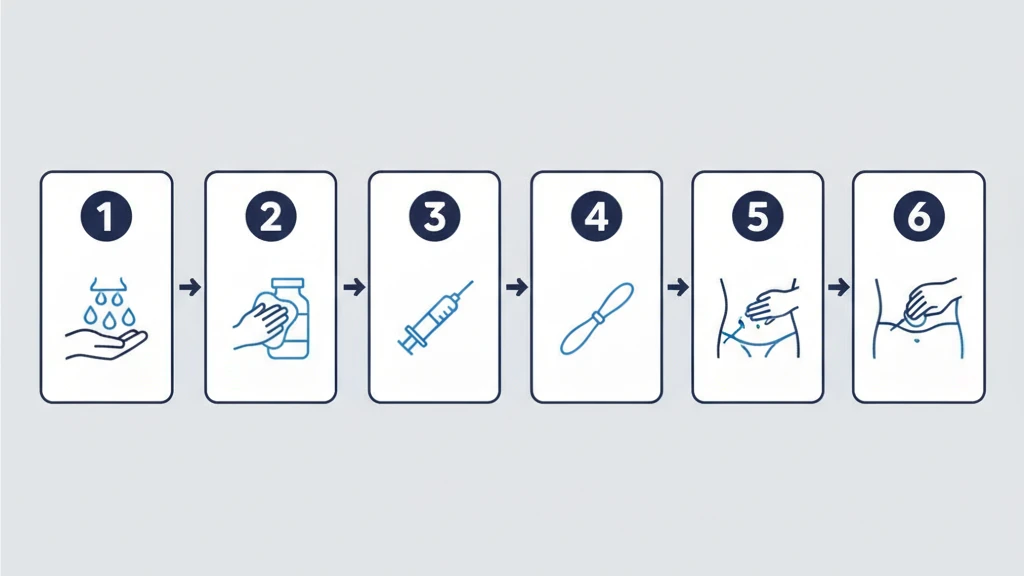
The 13-step protocol:
- 1.Wash hands thoroughly with soap for 20 seconds
- 2.Wipe the rubber stopper on your peptide vial with an alcohol swab and let it air dry for 10 seconds
- 3.Pull the syringe plunger back to draw air equal to your dose volume
- 4.Insert the needle into the vial and push the air in (this prevents vacuum formation)
- 5.Flip the vial upside down and slowly pull the plunger to draw your dose
- 6.Check for air bubbles, tap the syringe gently and push bubbles out through the needle
- 7.Choose your injection site: abdomen (2 inches from belly button), upper outer thigh, or back of upper arm
- 8.Wipe the injection site with a fresh alcohol swab and let it dry completely
- 9.Pinch skin between thumb and forefinger to create a 1-2 inch fat fold
- 10.Insert the needle at a 45-degree angle into the fat layer with a quick, confident motion
- 11.Push the plunger slowly and steadily over 3-5 seconds
- 12.Remove the needle, release the skin pinch, and apply light pressure with a clean alcohol swab
- 13.Immediately dispose of the syringe in your sharps container, never recap or reuse needles
Pain level should feel like a quick mosquito bite or minor pinch, most users rate it 1-2 out of 10. If injection is painful (5+ out of 10), you've likely hit muscle instead of fat. This happens when the needle angle is too steep or you're pinching skin in a lean area with minimal subcutaneous fat. Adjust to a shallower 45-degree angle or choose a different injection site with more padding.
Calculating Your Exact Dose
Dosing calculations intimidate beginners, but the math is straightforward once you understand the two-step formula. First, calculate your peptide concentration by dividing total peptide amount by water volume. Second, calculate injection volume by dividing your desired dose by that concentration.
Here's a concrete example: You reconstituted 5mg of BPC-157 with 2ml of bacteriostatic water. Your concentration is 5mg ÷ 2ml = 2.5mg/ml. Your target dose is 250mcg, which equals 0.25mg. Divide 0.25mg by your 2.5mg/ml concentration: 0.25 ÷ 2.5 = 0.1ml. That's 10 units on a standard insulin syringe.
Skip the math entirely by using our Peptide Reconstitution Calculator. Just enter your vial size, water amount, and desired dose for instant results. For IGF-1 LR3 specifically, the IGF-1 LR3 dosage calculator walks through the same math.
Five Mistakes That Ruin Your Results
Most peptide failures trace back to five common errors. These aren't minor details, each one significantly impacts effectiveness, safety, or both.
1. Shaking Instead of Swirling
When you shake a reconstituted peptide, you create foam and subject the fragile molecular structure to shearing forces that break peptide bonds. Studies show this reduces potency by 20-60% depending on how vigorously you shake.
The fix: After adding bacteriostatic water, swirl the vial in slow circular motions until the powder fully dissolves. This takes 30-60 seconds and preserves molecular integrity.
2. Skipping Refrigeration
Peptides are biologics. They degrade rapidly when warm. Room temperature storage reduces potency by 10-20% per day, meaning your peptide loses half its effectiveness within 72 hours.
The fix: Store reconstituted vials at 36-46°F in the back of your refrigerator immediately after mixing, away from the door where temperature fluctuates.
3. Reusing Needles
After penetrating skin once, needles develop microscopic burrs that cause additional tissue damage with each subsequent use. More importantly, infection risk increases 300% when reusing needles due to bacterial contamination.
The fix: Use fresh insulin syringes for every injection. They cost roughly $0.10 each, not worth the risk of saving 10 cents.
4. Under-Dosing
Many beginners under-dose their peptides based on outdated information or excessive caution. A common example: starting BPC-157 at 100-150mcg daily when clinical healing requires 250-500mcg. Using subtherapeutic doses means you'll waste time and money without seeing results.
The fix: Follow evidence-based protocols rather than experimenting with minimal doses. Use our calculators for verified dosing.
5. Ignoring Air Bubbles and Dose Math
Air bubbles in your syringe mean you're injecting less peptide than intended, a 0.05ml air bubble in a 0.1ml dose represents 50% loss. Similarly, dose calculation errors compound over time.
The fix: Always tap your syringe to move bubbles toward the needle tip, expel them before injecting, and double-check your concentration math with our calculator.
Frequently Asked Questions
Does injecting peptides hurt?
Peptide injections using insulin syringes feel like a quick pinch or mosquito bite, most users rate the discomfort at 1-2 out of 10. The thin needles (29-31 gauge) used for subcutaneous injection are significantly smaller than those used for vaccines or blood draws. The injection itself takes only 2-3 seconds.
If you experience genuine pain (5+ out of 10), you've likely penetrated too deep and hit muscle instead of fat. This happens when the needle angle is too steep or you're injecting in a lean area with minimal subcutaneous padding. Adjust to a shallower 45-degree angle or choose a different injection site with more fat.
How long does it take to see results from peptide injections?
Timeline varies significantly by peptide type. BPC-157 provides the fastest feedback, most users notice pain reduction within 1-2 weeks and significant healing improvements by week 4-8. TB-500 works more slowly due to its systemic mechanism: inflammation reduction appears around week 2-3, with full healing taking 6-12 weeks depending on injury severity.
Ipamorelin and other growth hormone secretagogues require the most patience, you'll notice better sleep quality and recovery by week 4-6, but visible muscle gain and fat loss don't appear until week 8-12. The key is consistency. Daily injections at proper doses produce results; sporadic use doesn't.
Can you inject peptides in the same spot every day?
No, rotating injection sites is critical to prevent lipohypertrophy, a condition where repeated injections cause scar tissue buildup that reduces peptide absorption. Use at least 4-6 different injection sites in rotation: left abdomen, right abdomen, left thigh, right thigh, and optionally the back of each upper arm. Wait 3-4 days before reusing the same spot.
This rotation pattern allows tissues to fully recover between injections. Mark injection sites on a calendar if needed until rotation becomes automatic.
What size needle should I use for peptide injections?
For subcutaneous injection (the method used by 95% of beginners), use standard insulin syringes: 0.5ml or 1ml capacity, 29-31 gauge, half-inch needle length. The 29 gauge represents optimal balance between ease of insertion and flow rate, thinner needles (31 gauge) hurt less but inject more slowly, while thicker needles (27 gauge) inject faster but cause more tissue trauma. Intramuscular injection requires larger equipment: 3ml syringes with 22-25 gauge needles measuring 1-1.5 inches long.
Start with subcutaneous using 1ml insulin syringes (29 gauge, half-inch) until you're comfortable with the basic technique.
Can I mix different peptides in one injection?
Generally no, each peptide has specific pH requirements and may interact chemically when combined. Mixing peptides in a single syringe risks reducing effectiveness or causing precipitation. The one common exception is Ipamorelin combined with CJC-1295, which are specifically designed to work synergistically and share compatible pH ranges.
Some advanced users also combine BPC-157 with TB-500, though using separate injections remains safer. When in doubt, use separate injections spaced 5-10 minutes apart.
The Bottom Line
Peptide injections aren't as intimidating as they first appear. The process breaks down into learnable steps: reconstitute your peptide with bacteriostatic water, calculate your dose, draw it into an insulin syringe, and inject subcutaneously at a 45-degree angle. Most beginners master this within 2-3 attempts, and the entire process takes 3-5 minutes once you're familiar with it.
The results justify the learning curve. By following proper subcutaneous technique, starting with beginner-friendly compounds like BPC-157, and avoiding the five critical mistakes outlined above, you'll see measurable improvements within 2-4 weeks. Pain reduction comes first, followed by visible healing progress, with optimal results appearing by week 6-8 for injury-recovery peptides.
The key is preparation and consistency. Use fresh syringes for every injection, rotate your injection sites daily, refrigerate reconstituted peptides immediately, and maintain your dosing schedule. These small details make the difference between optimal results and wasted product. Start conservatively with proven peptides, follow evidence-based protocols, and adjust based on your body's response.
Ready to optimize your protocol?
- Take our Peptide Quiz for personalized recommendations in 2 minutes
- Peptide Reconstitution Calculator to calculate exact doses instantly
- BPC-157 Dosage Calculator to find your ideal dosing schedule
- How to Reconstitute Peptides for the complete mixing guide
Related Articles
Peptides for Bodybuilding (2026)
Best peptides for bodybuilding: BPC-157, TB-500, MK-677, CJC-1295/Ipamorelin, HGH Fragment 176-191. Dosages and stacking protocols.
BPC-157 for Muscle Growth: Research
Does BPC-157 build muscle? Review of PubMed studies on muscle repair, healing mechanisms, dosage protocols, and how BPC-157 compares to TB-500 for recovery.
Peptides for Healing: What the Evidence Shows
Peptides for healing by tissue: tendon, bone, wound, gut, post-surgery. Which claims rest on human trials, which rest on rat studies, and what is unsafe.
KLOW Peptide: Benefits, Dosage, and KLOW vs GLOW
KLOW peptide benefits, blend composition (GHK-Cu, BPC-157, TB-500, KPV), per-component dosing math, the copper ceiling, and how KLOW differs from GLOW.