You have a reconstituted vial in the refrigerator, a sealed insulin syringe on the counter, and a pulse that keeps climbing because you have never stuck a needle into your own skin. Take a breath. Pinch a fold of abdominal fat, insert a 29 to 31 gauge needle at 45 degrees, push the plunger slowly over 5 seconds, hold for 5 seconds, and withdraw. The entire injection takes under 30 seconds. Millions of diabetes patients perform this exact motion every day.
This guide covers every step of peptide injection from opening the syringe wrapper to dropping the needle in a sharps container. You will learn subcutaneous and intramuscular technique, needle gauge selection, injection site maps with rotation schedules, sterile protocol, pain reduction strategies, and proper disposal. Whether you are injecting BPC-157, semaglutide, tirzepatide, GHK-Cu, or TB-500, the mechanical process is the same. The only variables are dose volume and injection site preference.
For peptide-specific injection guides, see how to inject BPC-157 and how to inject tirzepatide. For dosing references, the peptide dosage chart covers 15 compounds. If you are completely new to peptides, start with the beginner's guide before reading this page.
No peptide discussed in this article is FDA-approved for general injection use outside of specific branded products (semaglutide as Ozempic/Wegovy, tirzepatide as Mounjaro/Zepbound). All information reflects published research, manufacturer guidelines, and established subcutaneous injection technique. Consult a licensed healthcare provider before using any peptide.
Get your custom peptide protocol:
- Tailored to your body and goals
- Precise dosing and cycle length
- Safe stacking combinations
- Backed by peer-reviewed studies
- Ready in under 2 minutes
Quick-Reference Injection Table
Before gathering supplies or choosing a site, this table gives you the core parameters for both injection routes. Print it or screenshot it for your first session.
| Parameter | Subcutaneous (SubQ) | Intramuscular (IM) |
|---|---|---|
| Needle gauge | 29 to 31 gauge | 25 to 27 gauge |
| Needle length | 0.5 inch (12.7mm) | 1 to 1.5 inch (25 to 38mm) |
| Insertion angle | 45 degrees | 90 degrees |
| Skin pinch required | Yes | No |
| Aspiration required | No | Yes (pull back plunger, check for blood) |
| Common sites | Abdomen, thigh, upper arm | Deltoid, vastus lateralis, ventrogluteal |
| Absorption speed | 15 to 30 minutes to peak | 10 to 20 minutes to peak |
| Pain level | Minimal (brief pinch) | Moderate (deeper penetration) |
| Bioavailability | ~90% for most peptides | ~90% for most peptides |
| Best for | BPC-157, semaglutide, tirzepatide, GHK-Cu, most peptides | Large-volume doses, deep muscle injuries |
| Bruising risk | Low | Moderate |
The default for 95% of peptide users is subcutaneous. Intramuscular injection is reserved for specific situations covered in the IM section below. If you are unsure which route to use, choose subcutaneous into the abdominal fat pad.
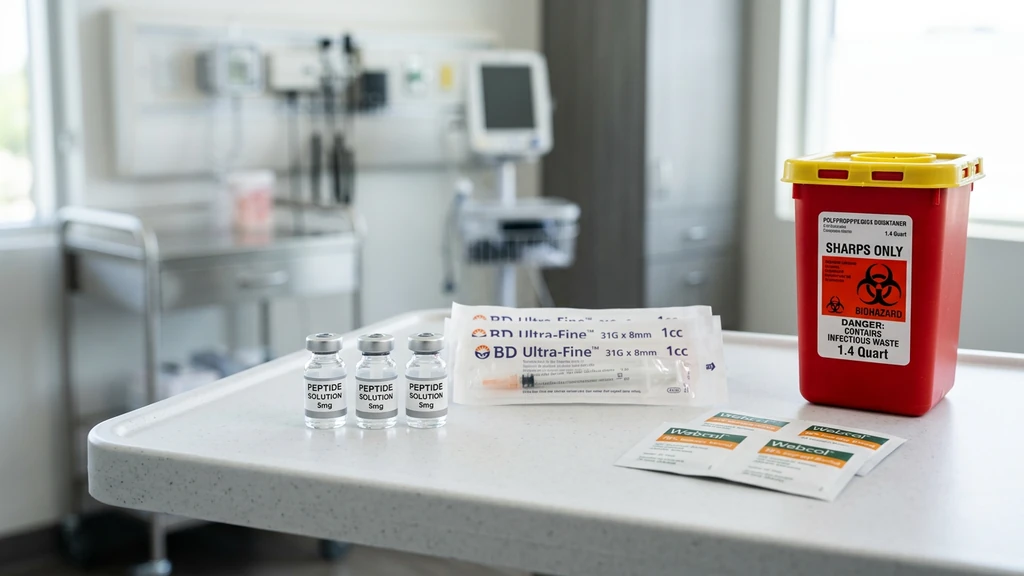
Supplies You Need Before Your First Injection
Gather every item before you uncap a syringe. Searching for an alcohol swab while holding a loaded needle is how contamination happens.
| Supply | Specification | Purpose |
|---|---|---|
| Insulin syringes | 29 to 31 gauge, 0.5 inch, 1mL or 0.5mL | Drawing and injecting peptide solution |
| Alcohol swabs | 70% isopropyl, individually wrapped | Disinfecting vial stopper and injection site |
| Bacteriostatic water | 30mL vial, 0.9% benzyl alcohol, USP grade | Reconstituting lyophilized peptide powder |
| Sharps container | FDA-cleared, puncture-resistant | Safe needle disposal |
| Permanent marker | Fine-tip | Labeling vials with date, peptide name, concentration |
| Clean flat surface | Wiped with disinfectant, well-lit | Working area for preparation |
| Peptide vial | Reconstituted or pre-mixed, refrigerated | The peptide itself |
Syringe sizing matters for accuracy. A 0.5mL syringe (50 units) has wider tick-mark spacing than a 1mL syringe (100 units). If your dose is 10 units, a 2-unit reading error on a 0.5mL syringe is a 20% dosing error. On a 1mL syringe with tighter markings, the same misread becomes more likely. Use the smaller syringe for doses under 25 units. Use the peptide unit converter to translate milligrams into syringe units based on your reconstitution volume.
Do not buy: pre-loaded syringes from unverified sources, reusable needles, needles thicker than 25 gauge, or glass syringes. Peptide solutions are water-based and flow easily through fine needles. Thick-gauge needles designed for viscous oil-based compounds cause unnecessary pain and bruising.
For guidance on evaluating peptide suppliers and reading certificates of analysis, see the peptide safety guide. For sourcing in 2026, see where to buy peptides.
Step 1: Reconstitute the Peptide
Most research peptides ship as white, freeze-dried powder inside a sealed glass vial. You cannot inject powder. Reconstitution converts the lyophilized cake into an injectable liquid. The process takes under 3 minutes and determines every dose you draw for the next 30 days.
Step-by-step reconstitution:
- 1.Remove the plastic flip cap from the peptide vial to expose the rubber stopper.
- 2.Swab the stopper with a 70% isopropyl alcohol pad. Let it air dry for 10 seconds.
- 3.Draw your chosen volume of bacteriostatic water into a syringe. Common reconstitution volumes are 1mL or 2mL depending on the peptide and desired concentration.
- 4.Insert the needle through the rubber stopper. Aim the tip at the glass wall inside the vial, not directly at the powder.
- 5.Push the water slowly down the inside wall. Think of it like pouring beer against the side of a glass to avoid foam. Direct spray onto the powder can shear peptide bonds through mechanical force.
- 6.Withdraw the syringe. Gently swirl the vial in small circles until the powder dissolves completely. This takes 30 to 60 seconds. Never shake. Aggressive shaking causes agitation-induced aggregation, denaturing the peptide and reducing potency (Manning et al., Pharm Res, 2010).
- 7.Label the vial with today's date, the peptide name, and the concentration (e.g., "BPC-157, 5mg/2mL = 2500mcg/mL, reconstituted 3/16/26").
- 8.Refrigerate immediately at 2 to 8 degrees Celsius.
Use bacteriostatic water, not sterile water. Bacteriostatic water contains 0.9% benzyl alcohol, which inhibits microbial growth and keeps the vial safe for multi-dose use over 28 to 30 days. Sterile water has no preservative. Bacteria can colonize a sterile-water vial within 24 to 48 hours of the first needle puncture (Mulloy & Bhatt, USP Microbiology, 2012). By day 5, you may be injecting contaminated liquid.
For peptide-specific reconstitution instructions, see how to reconstitute tirzepatide, how to reconstitute GHK-Cu, and how to reconstitute retatrutide. For shelf life after mixing, see how long reconstituted peptides last. Use the reconstitution calculator to determine exactly how much bacteriostatic water to add for your target concentration.
Step 2: Calculate and Draw Your Dose
Reconstitution math is where dosing errors happen. The peptide vial label states milligrams. Your syringe measures in units. You need to translate between the two.
The formula:
Dose in units = (desired dose in mcg / concentration in mcg per mL) x 100
Example: You have a 5mg BPC-157 vial reconstituted with 2mL bacteriostatic water. Concentration = 5000mcg / 2mL = 2500mcg per mL. Your target dose is 250mcg. Units to draw = (250 / 2500) x 100 = 10 units on a 1mL insulin syringe.
| Peptide | Common Vial Size | Typical Reconstitution | Concentration | Common Dose | Units to Draw |
|---|---|---|---|---|---|
| BPC-157 | 5mg | 2mL BAC water | 2500 mcg/mL | 250 to 500 mcg | 10 to 20 units |
| Semaglutide | 5mg | 2mL BAC water | 2500 mcg/mL | 250 to 500 mcg | 10 to 20 units |
| Tirzepatide | 10mg | 2mL BAC water | 5000 mcg/mL | 2500 to 5000 mcg | 50 to 100 units |
| GHK-Cu | 5mg | 2mL BAC water | 2500 mcg/mL | 200 to 500 mcg | 8 to 20 units |
| TB-500 | 5mg | 2mL BAC water | 2500 mcg/mL | 750 to 2000 mcg | 30 to 80 units |
Skip the math entirely by entering your vial size, reconstitution volume, and desired dose into the reconstitution calculator. For semaglutide-specific dosing, see the semaglutide dosage chart in mL and the semaglutide dosage calculator. For tirzepatide, use the tirzepatide dosage calculator.
Drawing from the vial:
- 1.Swab the vial stopper with a fresh alcohol pad. Let it dry.
- 2.Pull the syringe plunger back to the number of units you want to draw. This fills the barrel with air.
- 3.Insert the needle through the rubber stopper.
- 4.Push the air into the vial. This equalizes pressure and prevents a vacuum that makes drawing difficult.
- 5.Invert the vial so the stopper faces the floor and the needle tip is submerged in liquid.
- 6.Pull the plunger back slowly to your target number of units.
- 7.Check for air bubbles. If present, flick the syringe barrel with your fingernail to move bubbles to the top, then push the plunger slightly to expel them. An air bubble displaces peptide solution: a 3-unit bubble in a 10-unit draw means you actually have 7 units of peptide and 3 units of air. That is a 30% underdose.
- 8.Remove the syringe from the vial. The syringe is now loaded and ready.
Step 3: Subcutaneous Injection Technique
Subcutaneous injection places the peptide into the adipose (fat) layer between the skin and the muscle. This is the default route for nearly every research peptide. The fat layer acts as a slow-release depot, absorbing the peptide into the bloodstream over 15 to 30 minutes.
Think of the fat layer like a sponge sitting on top of a muscle. You want the needle tip in the sponge, not in the muscle below it. A 0.5-inch needle inserted at 45 degrees penetrates approximately 8 to 9mm, which lands squarely in the subcutaneous fat for most body types.
Choosing a Subcutaneous Injection Site
Three body areas are standard for subcutaneous peptide injection. The choice depends on fat thickness, accessibility, and comfort.
| Site | Location | Fat Thickness | Self-Injection Ease | Notes |
|---|---|---|---|---|
| Abdomen | 2+ inches from navel, avoid belt line | 1.5 to 3 cm (thickest) | Excellent | Preferred site for most users |
| Front of thigh | Middle third, front or outer aspect | 1 to 2 cm | Good | Easy to see; slightly more nerve endings |
| Back of upper arm | Fleshy area between shoulder and elbow | 0.8 to 1.5 cm | Difficult alone | Best if a partner administers |
The abdomen wins for most self-injectors. The subcutaneous fat pad is thickest here, typically 1.5 to 3 cm, giving you the widest margin for correct needle placement. The area is easy to see, easy to reach, and easy to pinch. Frid et al. (Diabetes Technol Ther, 2010) measured skin and fat layer thickness across 388 injection sites and confirmed the abdomen as the most consistent subcutaneous target.
Avoid injecting within 2 inches of the navel. The periumbilical area has denser connective tissue and more blood vessels, increasing bruising risk. Also avoid areas with visible veins, moles, scars, or skin conditions.
For injury-specific injection sites (near the knee, shoulder, elbow), see where to inject BPC-157 for knee pain and how to inject BPC-157. For weight-loss injectables, see GLP-1 injection sites, and before you draw a dose, run the numbers with the peptide dosage calculator.
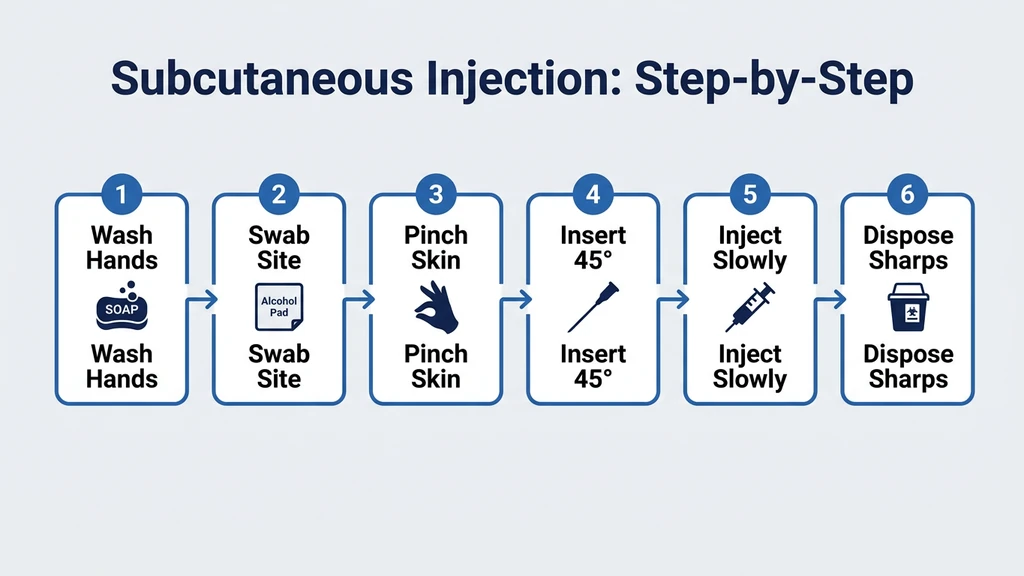
Step-by-Step Subcutaneous Injection
- 1.Wash your hands with soap and water for 20 seconds. Dry with a clean towel. This single step prevents the majority of injection-site infections (WHO Best Practices for Injections, 2010).
- 2.Swab the injection site with a 70% isopropyl alcohol pad. Use a single outward spiral motion starting at the center. Wait 15 seconds for the skin to dry completely. Injecting through wet alcohol pushes isopropyl into subcutaneous tissue, causing a sharp burn lasting 10 to 20 seconds.
- 3.Pinch a fold of skin and fat between your thumb and index finger. Pinch firmly. A solid pinch lifts the fat layer away from the muscle and provides pressure-induced analgesia that reduces needle sensation.
- 4.Hold the syringe like a pen or a dart in your dominant hand. Bevel up (the angled edge of the needle tip faces the ceiling).
- 5.Insert the needle at a 45-degree angle in a single, smooth motion. Do not hesitate or push slowly. A swift insertion passes through nerve-dense skin layers quickly. Jabbing is not reckless. It is the technique recommended by the WHO for subcutaneous injection.
- 6.Release the pinch. Once the needle is seated, let go of the skin fold. Maintaining the pinch during injection compresses the tissue and can force the peptide back out through the puncture.
- 7.Push the plunger slowly and steadily over 5 to 10 seconds. Rapid injection creates a pressurized pocket of fluid that stretches tissue and stings. For small volumes (under 20 units), 5 seconds is sufficient.
- 8.Hold the needle in place for 5 seconds after the plunger is fully depressed. This allows the peptide solution to disperse into the fat layer and prevents leakback through the needle track.
- 9.Withdraw the needle at the same angle you inserted it. Do not press on the injection site immediately. If a small drop of blood or peptide appears, apply gentle pressure with a dry cotton ball or gauze for 10 seconds. Do not rub.
- 10.Dispose of the syringe immediately in a sharps container. Never recap a used needle. Recapping is the leading cause of needlestick injury in clinical settings (CDC Sharps Safety, 2019).
Step 4: Intramuscular Injection Technique
Intramuscular (IM) injection places the peptide directly into muscle tissue. Absorption is slightly faster (10 to 20 minutes to peak plasma concentration vs. 15 to 30 for subcutaneous), but the trade-offs make IM the less common route for peptides. It requires a longer, thicker needle, involves a deeper insertion, and carries higher bruising risk.
When IM injection is appropriate: - Deep muscle injuries (hamstring tear, quad strain) where you want the peptide placed as close to the damaged fiber as possible - Large injection volumes (over 1mL) that would create an uncomfortable lump subcutaneously - Specific peptide protocols that call for IM delivery based on research data
For most peptide users injecting BPC-157, GHK-Cu, semaglutide, or tirzepatide, subcutaneous is the correct and easier route. If your protocol does not specifically require IM, skip this section.
Intramuscular Injection Sites
Three muscle sites are standard for IM injection. All three have adequate muscle mass, relatively few major blood vessels, and accessible angles for self-injection (except the gluteal site, which requires a partner).
| Site | Muscle | Location | Self-Injection Feasible | Volume Capacity |
|---|---|---|---|---|
| Deltoid | Deltoid muscle | 2 to 3 finger widths below the acromion (bony point of the shoulder) | Yes (non-dominant arm) | Up to 1mL |
| Vastus lateralis | Outer thigh | Middle third of the outer thigh, between knee and hip | Yes | Up to 2mL |
| Ventrogluteal | Gluteus medius | Upper outer quadrant of the buttock | Difficult alone | Up to 3mL |
The deltoid is the most accessible for self-injection. Sit down, relax the arm, and inject into the thickest part of the muscle belly. The vastus lateralis (outer thigh) is the alternative for those who prefer not to inject into the shoulder.
Step-by-Step Intramuscular Injection
- 1.Wash hands and prepare the syringe as described in the subcutaneous section above.
- 2.Select a 25 to 27 gauge needle, 1 to 1.5 inches long. This length reaches muscle tissue through skin and fat layers. For lean individuals, 1 inch is sufficient. For those with thicker subcutaneous fat, use 1.5 inches. A study by Poland et al. showed that a 1-inch needle reached the deltoid muscle in 86% of adults at standard BMI (Poland et al., Vaccine, 1997).
- 3.Swab the injection site with an alcohol pad. Wait 15 seconds to dry.
- 4.Do not pinch. Unlike subcutaneous, IM injection requires flat, stretched skin. Use your non-dominant hand to stretch the skin taut over the muscle. This helps the needle pass cleanly through the skin and close behind it.
- 5.Insert the needle at 90 degrees in a smooth, dart-like motion. Go straight in, perpendicular to the skin surface.
- 6.Aspirate: Pull back the plunger slightly and wait 5 to 10 seconds. If blood appears in the syringe barrel, you have hit a blood vessel. Withdraw the needle, dispose of the syringe, prepare a new one, and choose a slightly different spot. If no blood appears, proceed to injection. While some guidelines have relaxed aspiration requirements for vaccine administration, it remains standard practice for IM peptide injection to confirm correct needle placement.
- 7.Inject slowly over 10 seconds. Muscle tissue is denser than fat. Pushing too fast causes a painful pressure buildup.
- 8.Withdraw the needle at 90 degrees. Apply gentle pressure with a dry gauze or cotton ball for 10 seconds. Do not massage the area, as this can cause the peptide to disperse unevenly or increase bruising.
- 9.Dispose of the syringe in a sharps container immediately.
Needle Gauge Selection Guide
Gauge measures needle diameter. Higher numbers mean thinner needles. Thinner needles hurt less but draw liquid more slowly. For water-based peptide solutions, the trade-off is minimal because the liquid is low-viscosity and flows easily even through a 31 gauge needle.
| Gauge | Outer Diameter | Length Options | Pain Level | Best Use |
|---|---|---|---|---|
| 31 gauge | 0.26mm | 5/16 inch (8mm) | Barely noticeable | Thin-skin SubQ (elbow, knee, wrist) |
| 30 gauge | 0.30mm | 0.5 inch (12.7mm) | Brief pinch | Standard SubQ (abdomen, thigh) |
| 29 gauge | 0.34mm | 0.5 inch (12.7mm) | Brief pinch | Standard SubQ; slightly easier to draw |
| 27 gauge | 0.41mm | 1 inch (25.4mm) | Noticeable | IM injection (deltoid, thigh) |
| 25 gauge | 0.51mm | 1 to 1.5 inch | Moderate sting | IM injection; large-volume doses |
For subcutaneous peptide injection, use 29 or 30 gauge. This is the sweet spot: thin enough for minimal pain, wide enough to draw from the vial without fighting resistance, and short enough (0.5 inch) to stay in the fat layer at 45 degrees. If you inject near bony areas with thin skin overlying the bone (lateral knee, elbow, dorsal wrist), step up to 31 gauge.
Needle selection matters more than you might expect. Arendt-Nielsen et al. demonstrated that a 0.1mm reduction in needle diameter reduced pain perception by approximately 10 to 20% in subcutaneous injection trials (Arendt-Nielsen et al., Eur J Pain, 2006). The difference between a 25 gauge (0.51mm) and a 31 gauge (0.26mm) is nearly half the diameter and a proportional reduction in discomfort.
For specific peptide gauge recommendations, see the GHK-Cu injection dosage guide and the BPC-157 dosage guide for 200lb males.
Injection Site Rotation: Why and How
Injecting in the same spot repeatedly causes lipodystrophy: localized changes in the fat layer that appear as hard lumps (lipohypertrophy) or depressions (lipoatrophy). Lipohypertrophy also impairs peptide absorption. A study of 430 insulin-injecting patients found that 64.4% had lipohypertrophy at preferred injection sites, and those sites showed 25% slower insulin absorption compared to unaffected tissue (Blanco et al., Diabetes Metab, 2013).
The fix is simple: rotate your injection sites on a predictable schedule.
Abdominal rotation (most common for peptides):
Divide your abdomen into 4 quadrants, using the navel as the center point: - Upper left - Upper right - Lower left - Lower right
Inject in one quadrant per day, cycling through all four before returning to the first. Within each quadrant, space each injection at least 1 inch (2.5 cm) from the previous puncture in that quadrant. This gives each site a minimum 4-day rest between injections.
| Day | Quadrant | Notes |
|---|---|---|
| Monday | Upper left | Start at least 2 inches from navel |
| Tuesday | Upper right | Mirror position |
| Wednesday | Lower left | Below navel level |
| Thursday | Lower right | Mirror position |
| Friday | Upper left | Move 1 inch from Monday's spot |
| Saturday | Upper right | Move 1 inch from Tuesday's spot |
| Sunday | Lower left | Move 1 inch from Wednesday's spot |
Full-body rotation (for protocols with multiple daily injections or long cycles):
If you inject more than once daily or run cycles lasting 3+ months, rotate across body regions: - Week 1: Abdomen - Week 2: Right thigh - Week 3: Left thigh - Week 4: Right upper arm (if accessible)
This schedule ensures no single area bears excessive puncture load. For protocols involving peptide stacking where you inject 2 or 3 different peptides per day, use a different body region for each peptide rather than clustering all injections in one quadrant.
Sterile Technique: Preventing Infection
Injection-site infections are the most preventable complication of self-administered peptide injections. The bacteria that cause infection come from three sources: your skin, the vial stopper, and the environment. Addressing all three reduces infection risk to near zero.
The sterile technique checklist:
| Step | What to Do | What it Prevents |
|---|---|---|
| Wash hands | Soap and water, 20 seconds, before every injection | Transfers of S. aureus and E. coli from hands to injection site |
| Swab vial stopper | 70% isopropyl alcohol, let dry 10 seconds | Contamination of the peptide solution |
| Swab injection site | 70% isopropyl alcohol, single outward spiral, let dry 15 seconds | Introduction of skin flora into subcutaneous tissue |
| Use a new syringe every time | Never reuse insulin syringes | Bacterial biofilm formation on used needle surfaces |
| Do not touch the needle | Handle only the syringe barrel and plunger | Direct contamination of the needle tip |
| Store vials in refrigerator | 2 to 8 degrees Celsius | Bacterial growth in reconstituted solution |
| Use bacteriostatic water | 0.9% benzyl alcohol preservative | Microbial growth in multi-dose vials |
Never reuse an insulin syringe. A used needle develops microscopic burrs on the tip after a single pass through a rubber stopper and skin. The second use tears tissue rather than cutting cleanly, increasing pain and creating a larger wound channel for bacteria. Under electron microscopy, a once-used 31 gauge needle shows visible tip deformation (Puñal-Riobóo et al., Diabetes Technol Ther, 2014).
Signs of injection-site infection: Expanding redness beyond 2 cm from the puncture after 48 hours, warmth to the touch, pus or drainage, red streaks radiating outward, fever, or swelling that worsens rather than resolves. Minor redness and a small bump at the injection site within the first 24 hours are normal. If symptoms progress beyond 48 hours, seek medical evaluation. Do not attempt to drain an abscess at home. For a complete safety overview, see the peptide safety guide.
Pain Reduction Strategies
Pain from a correctly performed subcutaneous peptide injection ranges from "felt nothing" to "brief pinch." Most of the discomfort that new injectors experience comes from avoidable technique errors, not from the needle itself.
The 6 variables that control injection pain:
- 1.Let the vial warm slightly. Cold liquid stings. Remove the vial from the refrigerator 2 to 3 minutes before drawing. Do not warm it in hot water, a microwave, or direct sunlight. Peptides are thermolabile: temperatures above 25 degrees Celsius degrade most compounds. A few minutes at room temperature is sufficient to take the chill off without damaging the peptide.
- 1.Wait for the alcohol to dry. This is the single most common cause of injection pain. Isopropyl alcohol pushed into subcutaneous tissue by the needle causes a sharp, burning sensation lasting 10 to 20 seconds. Fifteen seconds of air drying after swabbing eliminates this entirely.
- 1.Inject slowly. Push the plunger over 5 to 10 seconds. Rapid injection creates hydraulic pressure in the tissue, stretching it painfully. For small volumes (under 10 units), 5 seconds is enough.
- 1.Pinch firmly. A strong pinch between thumb and index finger lifts the fat layer and activates pressure-induced analgesia in the surrounding tissue. A weak pinch leaves the skin taut and makes needle entry more noticeable.
- 1.Insert quickly. Paradoxically, a swift, dart-like insertion hurts less than a slow, hesitant push. The needle passes through nerve-dense skin layers in a fraction of a second when inserted quickly. Slow insertion prolongs contact with those nerves.
- 1.Breathe out during insertion. Exhaling relaxes the abdominal wall (and muscles generally). Tense muscles resist the needle. Relaxed tissue yields easily. Physical therapists use this principle during manual procedures.
For the first few injections: Hold an ice cube wrapped in a paper towel against the injection site for 20 to 30 seconds before swabbing. The cold temporarily numbs the skin. Most users stop doing this after the first week once they realize how little the injection actually hurts.
For injection-site reaction management specific to tirzepatide, see tirzepatide injection site reactions. For frequency guidelines, see how often to inject GHK-Cu.
Sharps Disposal and Legal Requirements
Every used syringe, needle, and lancet is classified as a "sharp" and must be disposed of in a puncture-resistant container. Tossing needles into household trash exposes waste handlers, family members, and pets to needlestick injuries and potential bloodborne pathogen transmission.
Acceptable sharps containers: - FDA-cleared sharps disposal containers (red, rigid plastic, available at pharmacies for $5 to $15) - A heavy-duty plastic household container (empty laundry detergent bottle, thick plastic jar) with a screw-on lid, labeled "SHARPS: DO NOT RECYCLE"
Never put sharps in: - Thin plastic bags or grocery bags - Glass containers (breakable) - Aluminum cans (sharp edges, crushable) - Any container that a child could open
When the container is three-quarters full, seal it. Do not compress or overfill. Your disposal options vary by location:
| Disposal Method | Availability | Cost |
|---|---|---|
| Pharmacy drop-off | CVS, Walgreens, and many independent pharmacies | Free to $5 |
| Community collection site | County health department programs | Free |
| Mail-back programs | Available from companies like Stericycle | $20 to $40 per container |
| Household hazardous waste events | Periodic community events | Free |
Check your state and local regulations. Some US states (California, New York, New Jersey, among others) have specific sharps disposal laws. The FDA provides a state-by-state guide at fda.gov/sharps.
Never recap a used needle. This is worth repeating. Recapping is the leading cause of accidental needlestick injury. Place the entire syringe, needle attached, directly into the sharps container after each injection.
Peptide Storage After Injection
Proper storage between injections determines whether your peptide retains full potency for 28 to 30 days or degrades into an expensive vial of inert liquid.
Storage rules for reconstituted peptides:
| Factor | Requirement | Why |
|---|---|---|
| Temperature | 2 to 8 degrees Celsius (refrigerator) | Peptide bonds are thermolabile; room temperature accelerates hydrolysis |
| Light exposure | Minimal; store in original box or wrapped in foil | UV light triggers photo-oxidation of amino acid residues (Kerwin & Remmele, J Pharm Sci, 2007) |
| Orientation | Upright, stopper facing up | Reduces surface area contact between solution and rubber stopper |
| Duration | 28 to 30 days max with bacteriostatic water | Benzyl alcohol preservative effectiveness diminishes over time |
| Freeze-thaw cycles | Avoid entirely | Ice crystal formation disrupts tertiary structure |
Practical tips: - Designate one shelf in the refrigerator for peptide vials. Keep them away from the freezer vent and the back wall where temperatures can dip below 2 degrees Celsius. - Write the reconstitution date on each vial with a permanent marker. When you reach day 28, discard the remaining solution regardless of how much is left. - If the solution turns cloudy, develops visible particles, or changes color, discard immediately. Turbidity indicates protein aggregation or microbial contamination.
For a complete storage guide covering lyophilized and reconstituted peptides, temperature excursions, and travel considerations, see how to store peptides. For bacteriostatic water storage requirements, see how much bacteriostatic water for semaglutide.
Common Injection Mistakes and How to Fix Them
Every mistake on this list has been made by thousands of first-time injectors. None of them are dangerous if identified and corrected. The danger comes from repeating them.
| Mistake | What Happens | Fix |
|---|---|---|
| Injecting through wet alcohol | Sharp burn lasting 10 to 20 seconds | Wait 15 seconds for skin to dry after swabbing |
| Pushing plunger too fast | Stinging, lump under skin, peptide leakback | Slow down to 5 to 10 seconds per injection |
| Reusing syringes | Pain, bruising, increased infection risk | Use a fresh syringe every time; they cost $0.15 to $0.30 each |
| Wrong needle angle (90 degrees SubQ) | Needle reaches muscle instead of fat | Insert at 45 degrees for subcutaneous; pinch skin first |
| Forgetting to aspirate (IM) | Possible intravascular injection | Pull back plunger, check for blood before injecting IM |
| Drawing air bubbles | Underdosing (air displaces peptide solution) | Flick barrel, push air to top, expel before injecting |
| Shaking the vial during reconstitution | Peptide denaturation, reduced potency | Swirl gently in small circles; never shake |
| Injecting cold solution | Stinging at injection site | Let vial sit at room temperature 2 to 3 minutes before drawing |
| Not rotating sites | Lipodystrophy (lumps, depressions, impaired absorption) | Rotate through 4 abdominal quadrants; use the schedule above |
| Storing reconstituted vials at room temperature | Bacterial growth, peptide degradation | Refrigerate immediately after every use at 2 to 8 degrees Celsius |
The air bubble question: Small air bubbles (1 to 2 units) injected subcutaneously are not medically dangerous. The air is absorbed by surrounding tissue within minutes. The problem is dosing accuracy, not safety. A 3-unit air bubble in a 10-unit dose means you received 7 units of peptide instead of 10. That is a 30% underdose. Always eliminate bubbles before injecting.

For additional troubleshooting specific to individual peptides, see how to take BPC-157 and the FDA peptide crackdown 2026 for regulatory considerations affecting peptide sourcing and supply.
Frequently Asked Questions
What gauge needle should I use to inject peptides subcutaneously?
A 29 to 31 gauge insulin syringe with a 0.5-inch (12.7mm) needle. This thickness is thin enough to minimize pain, short enough to stay in the subcutaneous fat layer at a 45-degree angle, and wide enough to draw peptide solution without excessive resistance. Arendt-Nielsen et al. (2006) showed each 0.1mm reduction in needle diameter cuts perceived pain by 10 to 20%.
Where is the best place to inject peptides?
The abdomen, at least 2 inches from the navel. Subcutaneous fat is thickest here (1.5 to 3 cm in most adults), making it the easiest target for correct needle placement. Frid et al. (2010) confirmed the abdomen as the most consistent subcutaneous site across 388 measurements. Rotate through 4 quadrants daily to prevent lipodystrophy.
Does injecting peptides hurt?
Minimal pain when technique is correct. A 29 to 31 gauge needle produces a brief pinch lasting under 1 second. The 3 most common causes of injection pain are injecting through wet alcohol (causes a 10 to 20 second burn), injecting cold solution from the refrigerator, and pushing the plunger too fast. Fix those variables and most users describe the sensation as barely noticeable.
Can I reuse insulin syringes for peptide injections?
No. A used needle develops microscopic burrs after a single pass through skin and a rubber stopper. Puñal-Riobóo et al. (2014) showed visible tip deformation under electron microscopy after 1 use. Reuse increases pain, bruising, and infection risk. Insulin syringes cost $0.15 to $0.30 each. Use a fresh one for every injection.
What is the difference between subcutaneous and intramuscular peptide injection?
Subcutaneous places the peptide in the fat layer (29 to 31 gauge, 45-degree angle, pinch the skin). Intramuscular places it in muscle tissue (25 to 27 gauge, 90-degree angle, stretch the skin). Bioavailability is approximately 90% for both routes. Subcutaneous is the default for 95% of peptide protocols. IM is reserved for deep muscle injuries and volumes above 1mL.
How do I know if my injection site is infected?
Normal post-injection signs include minor redness and a small bump resolving within 24 hours. Infection signs are expanding redness beyond 2 cm after 48 hours, warmth, pus, red streaks radiating outward, fever, or worsening swelling. If any of these appear, seek medical evaluation. Do not attempt to drain an abscess at home.
Is it dangerous to inject a small air bubble subcutaneously?
Not medically dangerous. A small air bubble (1 to 2 units) injected subcutaneously is absorbed by surrounding tissue within minutes. The real problem is dosing accuracy. A 3-unit air bubble in a 10-unit draw means you received only 7 units of peptide, a 30% underdose. Flick the syringe barrel to move bubbles to the top and push them out before injecting.
How long can I use a reconstituted peptide vial?
Up to 28 to 30 days when reconstituted with bacteriostatic water (0.9% benzyl alcohol) and stored at 2 to 8 degrees Celsius. If reconstituted with sterile water (no preservative), use within 24 to 48 hours. Write the reconstitution date on the vial. If the solution turns cloudy, develops particles, or changes color before 30 days, discard immediately.
The Bottom Line
The injection itself is the simplest part of any peptide protocol. Pinch the skin, insert a 29 to 31 gauge needle at 45 degrees, push slowly, hold for 5 seconds, withdraw. Under 30 seconds from insertion to disposal.
What separates a clean, effective injection from a painful or contaminated one is the preparation surrounding that half-minute. Reconstitute with bacteriostatic water, not sterile water. Swab the stopper and the skin, then wait for both to dry. Use a fresh syringe every time. Rotate through at least 4 injection sites. Label every vial with the date and concentration. Return it to the refrigerator immediately after drawing your dose.
For peptide-specific injection guides, see how to inject BPC-157 and how to inject tirzepatide. For reconstitution walkthroughs, see how to reconstitute tirzepatide, how to reconstitute GHK-Cu, and how to reconstitute retatrutide. Use the reconstitution calculator for concentration math and the peptide dosage chart for quick dose references across 15 compounds.
Related articles: - Peptide Safety Guide — comprehensive safety profiles for 15 peptides - How to Store Peptides — temperature, light, and shelf life rules - How Long Do Reconstituted Peptides Last? — shelf life by diluent type - Peptide Stacking Guide — combining multiple peptides safely - Where to Buy Peptides in 2026 — sourcing guide with third-party testing requirements - FDA Peptide Crackdown 2026 — regulatory landscape and what it means for buyers - Getting Started with Peptides — complete beginner's guide
Helpful Tools
Related Articles
How to Inject BPC-157: Sites & Guide
How to inject BPC-157 subcutaneously: step-by-step technique, injection site selection by injury, needle gauge, reconstitution, and sterile protocol.
How to Inject Tirzepatide: Full Guide
How to inject tirzepatide step by step: Mounjaro autoinjector pen technique, compounded vial subcutaneous injection, injection sites, and rotation schedule.
Reconstituting GHK-Cu 50mg: Step-by-Step
Reconstitute a 50mg GHK-Cu vial with 2mL BAC water for 25 mg/mL (4 IU per 1mg dose). Full conversion chart, color check, storage, and injection steps.
Where to Inject Sermorelin: Best Sites & Technique
Where to inject sermorelin for best results. Abdomen, thigh, and upper arm injection sites ranked, plus step-by-step subcutaneous technique and timing protocol.